
WEST breaststroke
We keep hearing that breaststroke is not healthy for the lower back. I, personally, wouldn’t want to call these people wrong, so I’ll just try to raise a few questions:
Can breaststroke without breathing be good for the lower back?
Are breaststroke leg movements with open knees not good for strengthening the legs and core muscles?
I guess you know the answers to that: Not only is it good for your lower back, it will also keep it healthy.
And so, let me try to raise another question:
Breaststroke works on 240 muscle groups in the body, more than any other of the four styles (freestyle and backstroke – approximately 170 groups and butterfly approximately 200). If you could take the advantages of breaststroke and leave the disadvantages aside, would you swim breaststroke?
Or, in other words – would you swim breaststroke the WEST way?
WEST swimming technique regards every person as if he or she has a herniated disc in their neck or lower back, even if that person has no pain at all.
It’s important to understand that the five drill below will help you strengthen your core muscles, elongate your muscles and eventually swim faster and with no pain.
If for any reason you do feel pain in your lower back or neck, you have to consult a senior WEST trainer, or even take a WEST course to learn to do it correctly.
- Floating and slowly standing up
- Circles with the hands and freestyle movements with the legs
- Circles with the hands with fins and standing up while rolling
- Circles with the hands with breathing and fins
- WEST breaststroke with motion separation
- Floating and slowly standing up
Lay on the water with your face down, looking at the bottom of the pool, hands spread open at shoulder width. After 5 seconds bring your knees to your abdomen and stand up slowly. It’s very important not to raise your head before your feet are stably on the ground.
***Goal – To get your body used to standing up when you run out of air. This is an amazing drill to release your lower back and strengthen your abbs. People who have trouble sinking can use the wall: put your hands on the wall and practice standing up slowly, keeping your hands on the wall the whole time.
- Circles with the hands and freestyle movements with the legs
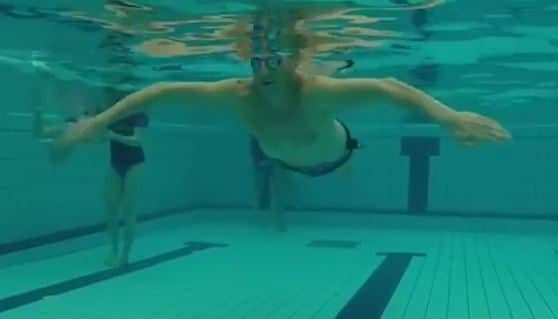
You make Circles with your hands and slow freestyle movements with the legs for about 10-12.5m. It’s very important to keep your correct stretch depth, according to your flexibility level. In any case you shouldn’t stretch your hands along the waterline like the Olympic swimmers do, to avoid stress to the neck and lower back during the stretch. Throughout the motion the legs work delicately, not in order to move forward, but in order to float and relax.
***Goal – To get your body used to the correct hand movement without breathing, relax the lower back using the leg movement and open up the lungs.
- Circles with the hands with fins and standing up while rolling
Repeat the previous drill, but this time let the legs work with fins on. Put your hands in an arrow, kick for 3 seconds and only then make the circle movement with your hands. Here, too, you do the drill for 10-12.5m each time without breathing. When you run out of air or reach that distance roll over in order not to create stress to the lower back while standing up.
***Goal – Beyond opening the lungs, to make the leg muscles longer and more flexible, and also to learn how to separate the movements in preparation for the next drill.
- Circles with the hands with breathing and fins
Put your hands in an arrow in your correct WEST stretch depth. If you don’t know what that is, put your hands 35cm below the waterline, a little deeper that your head. Kick delicately with the fins for 3 seconds, and the open your hands without working your neck and lift your head up to breath. It’s important to try to work very delicately or not at all with the legs while opening the hands in order not to arch your lower back.
***Goal – To allow the fins to help us ease the neck while lifting the head, and time the breathing, in order for the power of the hands to lift us out of the water and not working our neck or lower back.
- Full WEST breaststroke with motion separation
Open your hands, lift your head. During this time it’s very important for the legs to remain straight and motionless. Only after the head goes back in the water, neutral and facing downwards, you begin the breaststroke leg movement. When the leg movement is done, wait in arrow position for 3 seconds. Here’ too, it’s important to maintain your correct stretch depth, your head down, and not to make fast leg movements.
***Goal – To use the amazing muscles that breaststroke develops, and at the same time keep motion separation and a stretch depth that will protect your lower back while doing so.
It is important to note that when we talk about WEST breaststroke we are not talking about a 50m sprint but about 100m and over, where you can swim faster and get tired much more slowly.
In 200m competitive swimming and 400m individual medley the difference between those who swim WEST and those who swim in other methods for people over 20 years old is incredible. They simply apply less effort and swim faster.